Illuminate Your Creativity: Uncover the Best Lighting Secrets for Stunning Content!
Lighting is a crucial element in content creation that can make or break the quality of your work. Whether you are a seasoned professional or just starting, understanding the importance of lighting for content creators can elevate your videos, photographs, and live streams. Bad lighting can lead to unflattering shadows, washed-out colors, and an overall lackluster presentation that detracts from your message. In contrast, good lighting can enhance details, create mood, and draw attention to your subject. With a wide array of lighting options available, from natural sunlight to sophisticated artificial setups, every content creator has the chance to find the perfect lighting that suits their style and needs.

Understanding the Basics of Lighting
Before diving into specific lighting types, it's essential to understand some fundamental concepts. Lighting can be broadly categorized into natural light and artificial light. Natural light refers to sunlight, which varies throughout the day and can create different moods based on the time and weather. Artificial light, on the other hand, includes various man-made sources like bulbs, LEDs, and studio lights that can be adjusted for desired effects. A crucial aspect of lighting is color temperature, measured in Kelvin (K), which influences the warmth or coolness of the light. Warmer lights (below 3000K) are often used to create a cozy atmosphere, while cooler lights (above 5000K) can produce a more clinical or vibrant feel. Understanding these concepts will help you select the right lighting for your projects.
Types of Lighting for Content Creation
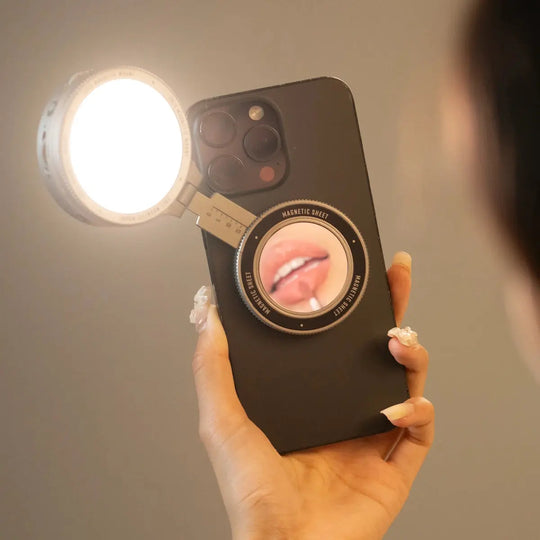
There are several types of lighting that content creators can utilize to enhance their work. One of the most popular options is softbox lights. These lights diffuse the light, reducing harsh shadows and creating a softer, more flattering illumination. They are ideal for portrait photography and video work. Another great choice is LED panels, which are versatile and energy-efficient. They offer adjustable brightness and color temperature, allowing creators to customize their lighting setup easily. Ring lights have gained popularity for makeup tutorials and vlogs due to their ability to provide even lighting and eliminate dark circles under the eyes. Additionally, portable lights can be a lifesaver for on-the-go creators, providing flexibility and ease of use in various settings. Each of these lighting types has its unique features and advantages, making it crucial to assess your specific needs before making a decision.
Natural Light vs. Artificial Light
When it comes to choosing between natural and artificial lighting, both have their distinct benefits and drawbacks. Natural light is often praised for its flattering qualities; it can produce stunning effects, especially during the golden hour—just after sunrise or before sunset. However, it is also unpredictable and can change quickly due to weather conditions or the time of day. On the other hand, artificial lighting provides consistency and control over your environment. Creators can shoot at any time without worrying about external factors. However, artificial lighting may require additional setup and adjustments to achieve the desired look. Ultimately, the choice between natural and artificial lighting depends on your content style, schedule, and available resources.
Setting Up Your Lighting for Maximum Impact
Once you have chosen your lighting type, the next step is to set it up effectively. Start by considering the angle of the light source. Placing the light at a 45-degree angle to your subject can create dimension and depth. Experiment with different positions to find the most flattering setup. Pay attention to shadows as well; harsh shadows can distract from your content, so try to soften them by using diffusers or bouncing light off walls. Additionally, adjust the brightness of your lights to ensure your subject is well-lit without overexposing any areas. A good tip is to use a light meter or your camera’s histogram to monitor exposure levels. Lastly, don’t underestimate the power of backlighting, which can add a professional touch to your videos or photos.
Common Mistakes to Avoid in Lighting
Even experienced creators can fall into common lighting pitfalls. One frequent mistake is overexposure, which occurs when too much light washes out the details of the subject. To avoid this, adjust your camera settings or distance from the light source. Poor light placement is another common error; placing lights too close can create unflattering shadows, while too far can result in dim images. Additionally, many creators overlook color temperature, leading to inconsistent lighting that can confuse viewers. Always test your lighting setup before going live or shooting, and don’t hesitate to make adjustments to get it just right. Learning from these mistakes can significantly improve your content quality.
Enhancing Your Content Through Effective Lighting
In conclusion, lighting is an essential component of content creation that should never be overlooked. By understanding the basics of lighting, exploring various options, and setting up your lighting effectively, you can enhance the quality of your videos and photos significantly. Remember to avoid common mistakes and continuously experiment with different setups to find what works best for you. Good lighting can transform your content, making it more engaging and visually appealing, so take the time to invest in this critical aspect of your creative process.


